Posts
Metropoli Gijón 2015 poster contest
/in Illustration /by David Figueiras64 posters submitted to the Metrópoli Gijón 2015 contest, great quality in all of the, undoubtly we have incredible talent and creativers here in Asturias. Below you can see my proposal for the contest, hope you like it! In 15 days, we will know the winner, huge challenge!

Create a cute planet cartoon character in 9 steps
/in Illustration, Tutorials /by David FigueirasBrief step by step tutorial with tips and tricks for creating cartoon-style characters
In this tutorial I will explain and show you my process of how to create a cute planet cartoon character from a sketch in 9 easy steps with Adobe Illustrator. Here you will learn some tips about the usage of width tool, live paint, digital inking and refined sketching applied to the creation of cartoon characters. The techniques described below are part of my usual process of design, but you can take them as a reference to help you to improve your working process, applying them to your own style of illustration.
Tutorial Details
- Program: Adobe Illustrator CS5 or more
- Difficulty: Intermediate
- Topics Covered: Width tool, live paint, sketching, character creation
- Estimated Completion Time: 1 hour
Step 1
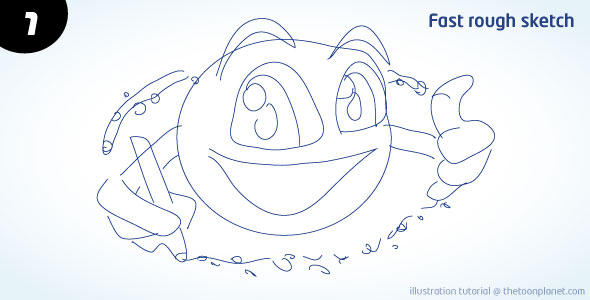
In the initial stage I drew a fast rough sketch to place the basic proportions and shapes of the character. I usually draw the sketch with a pencil and papel and then scan it but this time I did it directly with the wacom tablet in Illustrator. I would recommend to try both posibilities and see which fits better your style, in my case, I prefer drawing pencil because I can draw in a natural way fastly.

Step 2
If you have a really initial good sketch you can avoid this step, but It will help you to construct better shapes and lines. You can set your actual layer as “template” for the rough sketch in options and create a new one for the final lines drawing over the previous strokes.

Step 3
In the third stage, I make the definitive lines and strokes, so I draw carefully with the pen tool or with my wacom tablet and drawscribe plugin. Don’t feel bad for using basic shape tools for making circles or rectangles if you need them, you will gain a lot of time for paying attention to other details.

Step 4
I have to delete some lines and set a wider stroke to all lines so I can see them better for the next step and for giving more visual power to the character.

Step 5
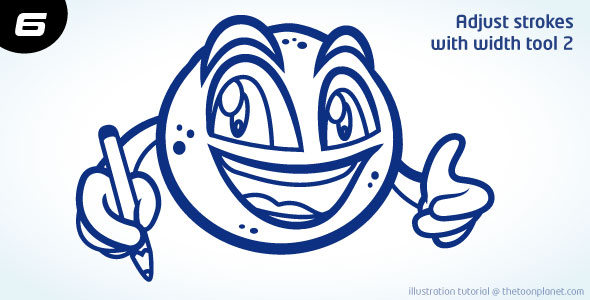
In the next two steps I use the illustrator width tool which helps me a lot in the digital inking process. Instead of using the normal pen tool and making all the shapes of the contour, I can modify the width of the strokes wherever I want.

Step 6
Take into account that outer strokes are wider than inner strokes, and detail strokes are the thinnest.

Step 7
Now, It’s time to use live paint, a tool which may help you coloring your character very fast. When you have filled all the color, you can emphasize the outer stroke a little more by adding a new one around all the character.

Step 8
I think eyes and mouth are drawing attention too much, so I decide to change them with a softer color and to delete the contour of the eyes.

Step 9
Finally, I change the basic color palette of the character into interesting gradients. Radial ones will help you to create shadow and light areas giving volume to the character, so I try this till I get a good result.

Final image
Put the characer over a background and add a thin outer white line and you will get an awesome cute cartoon planet!


